SharePoint 2013 Client-side rendering

Triveni

Client-side rendering (JS Link)
You can use it to style complete List Views, Fields, Search Results and more. This makes it a lot simpler and more intuitive, especially for web developers who haven’t used SharePoint before.
JSLink files have the ability to quickly and easily change how the list views and forms are rendered.
More specifically how the fields in that list should be displayed.
Overview
Client-side rendering is a new concept in SharePoint 2013. It provides you with a mechanism that allows you to use your own output render for a set of controls that are hosted on a SharePoint page (list views, display, add and Edit forms).
Client Site Rendering is simply when the data is transformed using the client rather than the server. This means using client-side technologies, such as HTML and JavaScript. It allows us to style SharePoint elements using JavaScript, rather than having to write XSLT.
How to deploy the JSLink templates?
Below are the options to deploy JS Link.
1. Set the JS Link property on a List View Web Part
2. Set the SPField.JSLink property in the Field XML definition
3. Set the SPField.JSLink property using the Server-Side Object Model
4. Set the SPField.JSLink property using PowerShell
Example on Client-side rendering (JS Link)
Below sample shows deploying JSLink using list view web part.
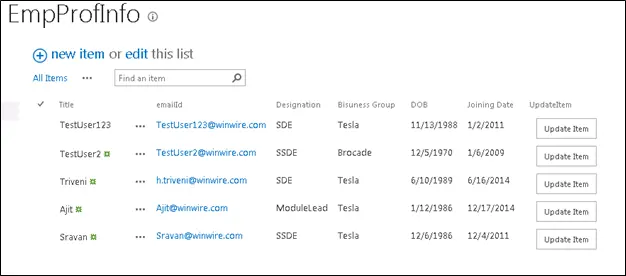
Requirement: Update SharePoint list specific item by clicking specific row button as shown in below screenshot. (Rendering SharePoint list field as update button using Client-side rendering).
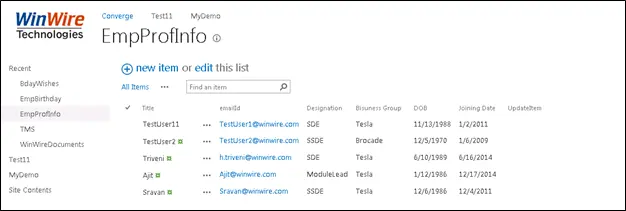
• Create a custom list as shown in below screenshot
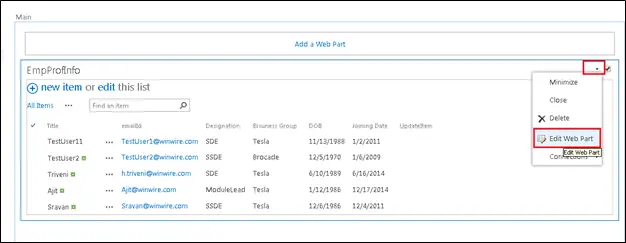
• Edit a web part to call the JSlink file.
• Below screenshot shows rendered hyperlink field as a button.
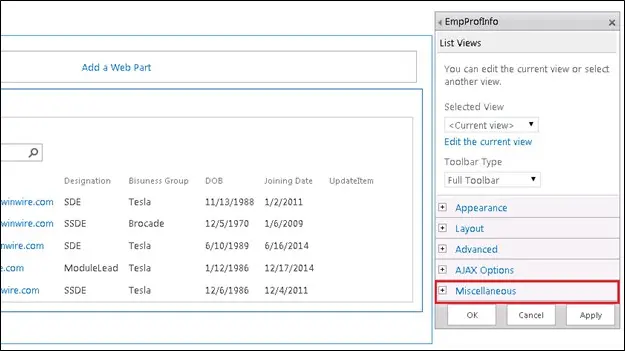
• Add the JS file path in the JS Link section shown below
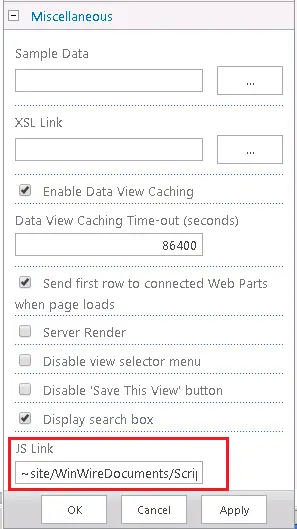
Note:
~site– if the .js file is located on the site where your list view Web Part exist.
~sitecollection– if the .js file is located in the site collection level.
- The Below script shows rendering “UpdateItem” hyperlink field as a button in every row and on click on a button, open a specific row to edit an item.
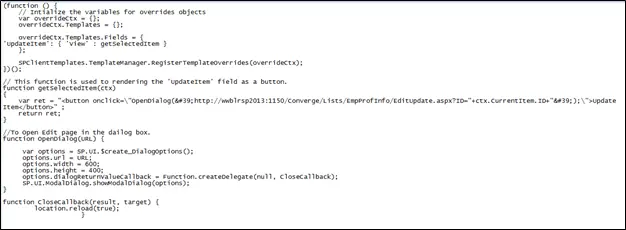
.JS file
(function () {
// Intialize the variables for overrides objects
var overrideCtx = {};
overrideCtx.Templates = {};
overrideCtx.Templates.Fields = {
‘PercentComplete’: { ‘View’ : ‘<div style=”background: #F3F3F3; display:block; height: 20px; width: 100px;”><div style=”background: #0072C6; height: 100%; width: <#=ctx.CurrentItem.PercentComplete.replace(” %”, “”)#>%;”></div></div>’ },
‘UpdateItemJS’: { ‘View’ : getSelectedItem}
};
SPClientTemplates.TemplateManager.RegisterTemplateOverrides(overrideCtx);
})();
function getSelectedItem(ctx){
var ret = “<button onclick=\”OpenDialog(‘Servername:Port/Lists/JSLinkTest/EditForm.aspx?ID=”+ctx.CurrentItem.ID+”‘);\”>Update Item</button>” ;
return ret;
}
function OpenDialog(URL) {
var options = SP.UI.$create_DialogOptions();
options.url = URL;
options.width = 600;
options.height = 400;
options.dialogReturnValueCallback = Function.createDelegate(null, CloseCallback);
SP.UI.ModalDialog.showModalDialog(options);
}
function CloseCallback(result, target) {
location.reload(true);
}
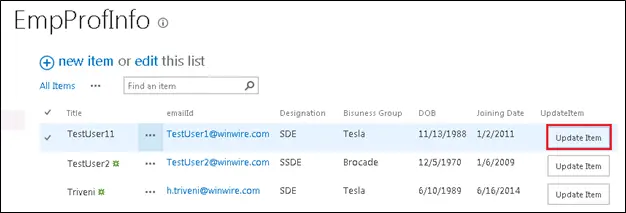
• Below screenshot shows rendered hyperlink field as the button.
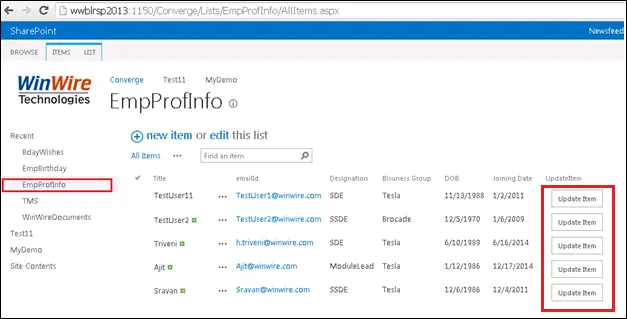
• Click on the “Update Item” button to edit a specific row.
• On click of Update Item button, below model pop up will open to update an item.
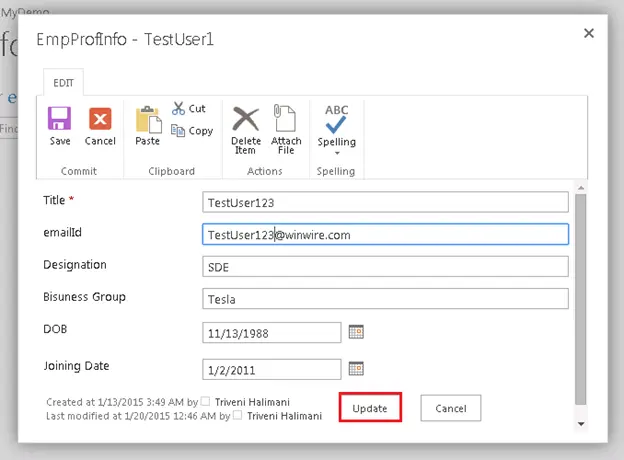
•Below screenshot shows updated item saved in an “EmpProfInfo” list.

More examples
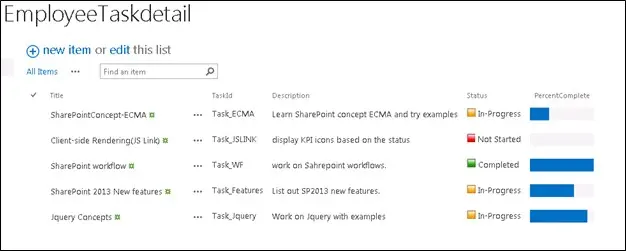
Requirement: Rendering KPI icons based on status and showing theprogress of atask.
Code in js file:
(function () {
// Intialize the variables for overrides objects
var overrideCtx = {};
overrideCtx.Templates = {};
overrideCtx.Templates.Fields = {
‘Status’: { ‘View’ : ChangeStatusIcon},
‘PercentComplete’: { ‘View’ : ‘<div style=”background: #F3F3F3; display:block; height: 20px; width: 100px;”><div style=”background: #0072C6; height: 100%; width: <#=ctx.CurrentItem.PercentComplete#>%;”></div></div>’ }
};
SPClientTemplates.TemplateManager.RegisterTemplateOverrides(overrideCtx);
})();
function ChangeStatusIcon(ctx)
{
switch (ctx.CurrentItem.Status) {
case ‘Not Started’:
var ret = “<img src=’Servername:port/Converge/WinWireDocuments/Images/NotStarted.png’> Not Started</img>” ;
return ret;
break;
case ‘In-Progress’:
var ret = “<img src=’Servername:port/Converge/WinWireDocuments/Images/InProgress.png’> In-Progress</img>” ;
return ret;
break;
case ‘Completed’:
var ret = “<img src=’ Servername:port/Converge/WinWireDocuments/Images/Completed.png’ > Completed</img>” ;
return ret;
break;
}