Azure Logic Apps Custom Connector Using OpenAPI

Tisham
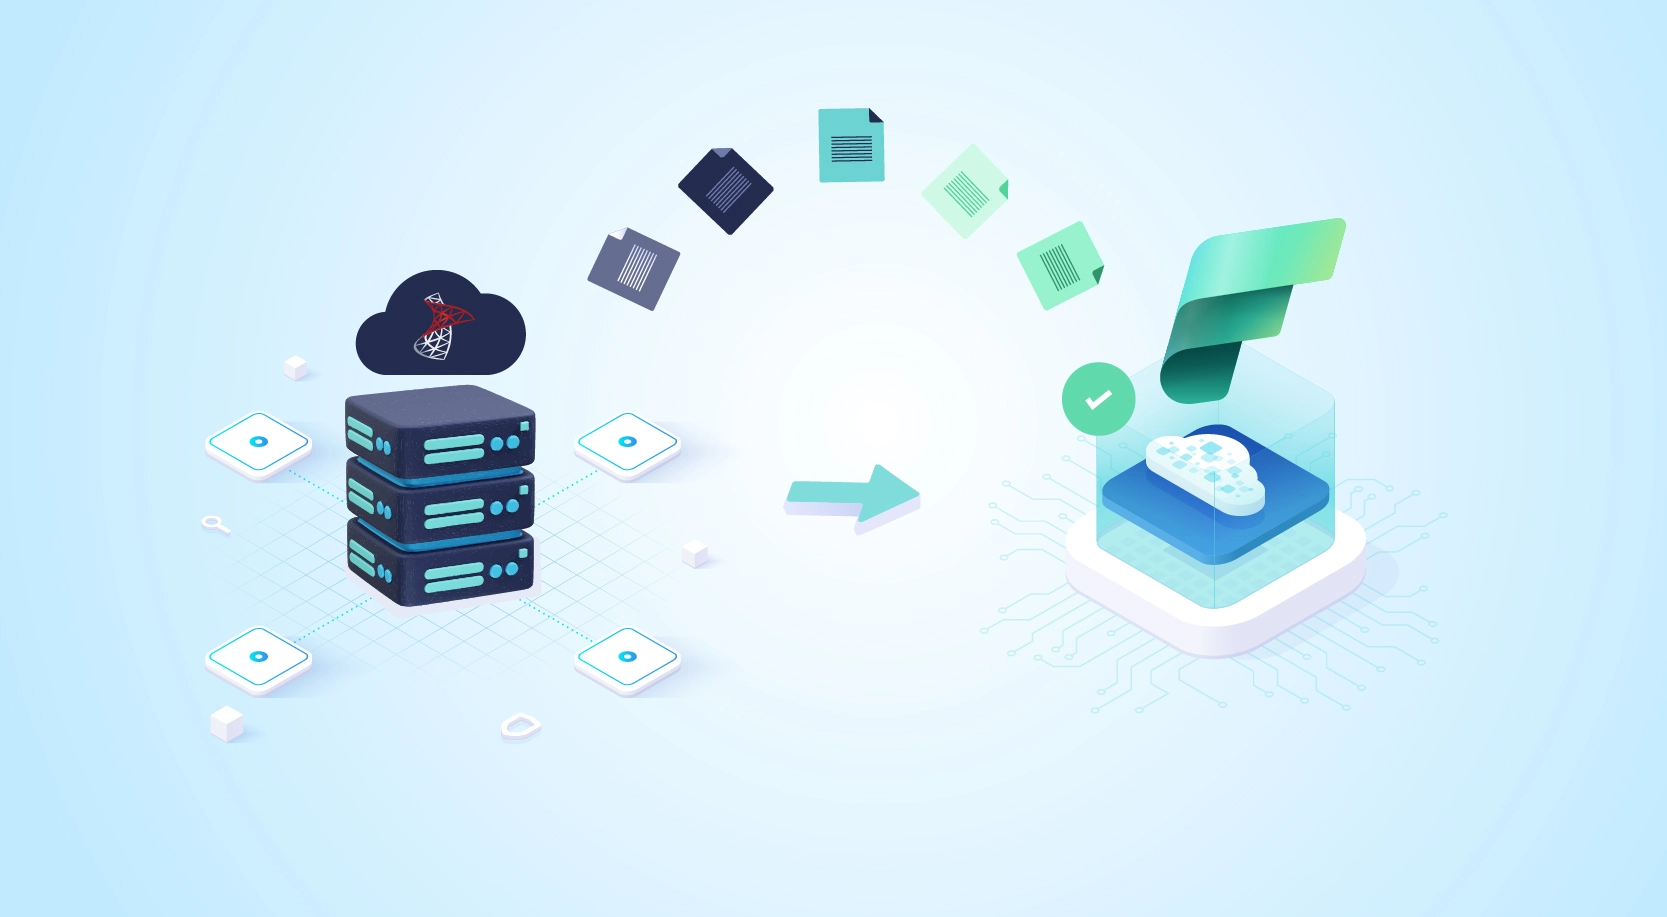
Azure Logic Apps comprises of a variety of connectors for popular SaaS, PaaS and on-premises systems. Though the current library has more than 220 connectors, it’s impossible to have complete coverage for every possible method that’s used within the enterprise. The good part is that the custom connectors can fill gaps in the evolving library of connectors.
In this article we are going to see how to create a AzureLogic Apps Custom Connector using openAPI file and utilize this custom connector in a Logic App.
Prerequisites:
- Open API file.
- Access to Azure portal.
First, let’s understand what a logic app, a connector and custom connector means:
Logic Apps: Azure Logic Apps is a cloud-service that helps you schedule, automate, and orchestrate tasks, business processes, and workflows when you need to integrate apps, data, systems, and services across enterprises or organizations.
Connector: Connectors provide quick access from Azure Logic Apps to events, data, and actions across other apps, services, systems, protocols, and platforms. By using connectors in your logic apps, you expand the capabilities for your cloud and on-premises apps to perform tasks with the data that you create and already have.
Custom connectors: Custom connectors are used to make call to custom APIs & services.
Note: Open your API file with notepad and check if it has null as description for any of the operations and replace it with some string. Otherwise it generates an exception while creating custom connector.
How to Build a Custom Connector
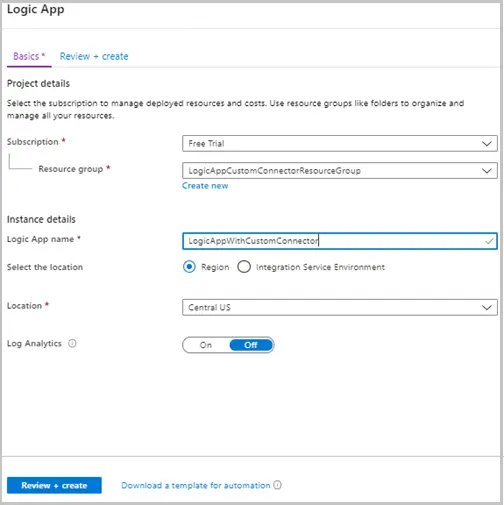
- Login to “http://portal.azure.com/”, search “Logic Apps Custom Connector” and click on “Add”. Enter below details:
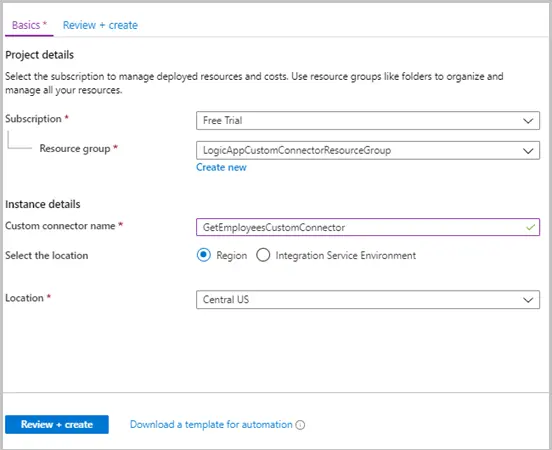
Select resource group. Click on “Review and create” and then “Create”. Once deployed click on “Go to resource” which will open the connector.
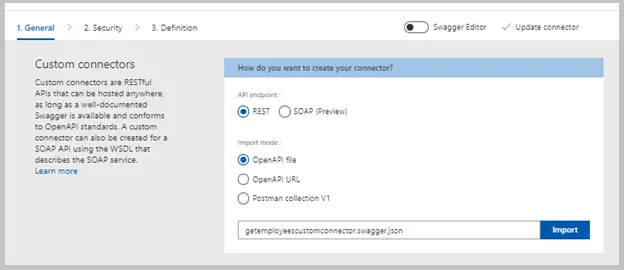
Now it is time to design the custom connector. To design custom connector, click on ‘Edit’.
Now you might have to zoom out to see all the options on next screen (refer screenshot). API endpoint should be “REST”. Import mode should be “OpenAPI file” and then click on import button to browse and select your open API file.
Once file is selected it automatically fills all the required details “Scheme”, “Host” & “Base URL” into “General information” section. You can add icon background color and description.
Now click on “Security” tab. In security tab: Edit authentication type to API Key.

In ‘parameter label’ enter API Key. Now connector can access API.
Click on ‘Definition’. Next screen shows you all the operations from your API. At the right top click on update connector.
Custom connector is created. Now it’s time to consume this custom connector in a Logic App. Let’s create a logic app first in our next step.
2. Go to home page, search “Logic apps”, click on add and enter details in below screen:
Click on “Review and create” and then “Create”. Once deployed click on “Go to resource” button.
Which takes you to logic app designer page shown below, click on “When a HTTP request is received”. We have selected HTTP request as the trigger for our logic app. In simple words, to run our logic app we need to make a HTTP request to URL generated in this step.

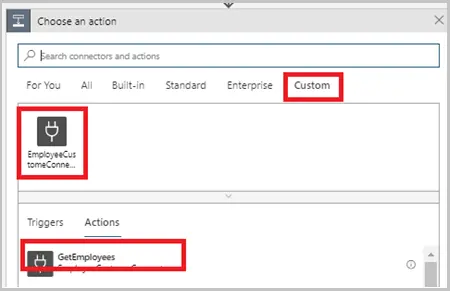
On next screen click on “New step”, click on “Custom” to see all the custom connectors available. Now select your custom connector and under actions select “GetEmployees”.
Now you will be asked to create a connection. Type connection name and enter API Key in second text box. Usually it is labelled as your API key. Click on “Create”.

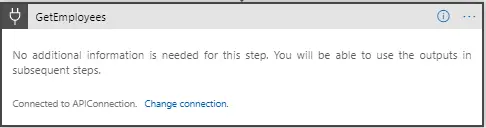
On successful creation of connection you see below screen:
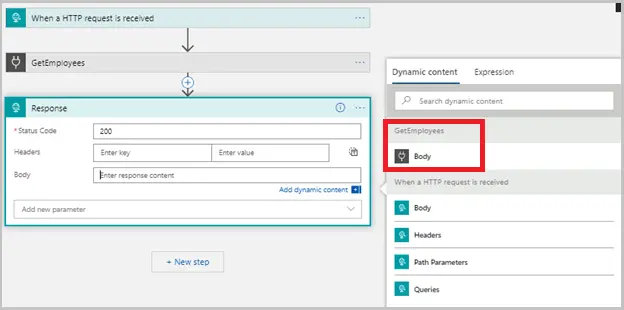
Now click on “New step” and search for response and then select “Response” under actions.
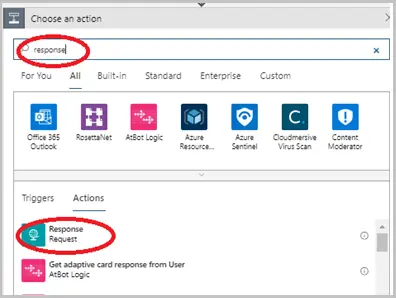
On click of “Response” under actions you see below screen. Keep the status code as 200 and in body select “Body” under GetEmployees.
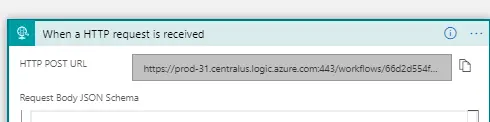
On top left corner click on save to save the Logic app. After saving logic app in first step a URL is generated as shown below. Keep this URL to test the logic app.
Before testing let us understand what we are doing in logic app.
- In first step, we selected “When a HTTP request is received” as trigger. Which means logic app is triggered when a POST request is made to the URL generated in this step.
- In next step first we added custom connector, created a connection to access the API and called custom connector operation “GetEmployees” to get the list of employees.
- Lastly, we are returning the custom connector output as the response of the logic app. So, logic app will return us a list of employees along with 200 status code. We can see the “Run history” of the logic app by going to “Overview section” in home page of logic app.
Logic app can be triggered/tested by making a POST request to the logic app URL from Postman.
Calling a Parametrized Operation from Custom Connector
Consider an API operation “GetEmployeeById” which accepts empId as input parameter. How do we implement this?
This time we will investigate only the step different from previous example:
- Now we must pass an employee id from Postman while triggering the logic app which will be passed further to custom connector.
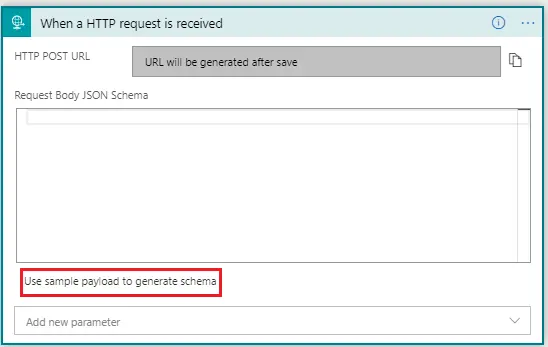
While creating logic app: In first step click on “Use sample payload to generate schema” and paste this JSON object {“empId” : 1 } in pop up and click “Done” to generate schema.
Note: Payload is the JSON you pass to Logic app. It might have properties as per your requirement e.g.
{“empId” : 1,”firstName” : “John”,”lastName” : “Cena” }
2. In next step we get the empId from payload into a newly declared variable called empId. Pass this variable (notice purple color for variable) to operation “GetEmployeeById”. Response of logic app is what we received from operation “GetEmployeeById“.
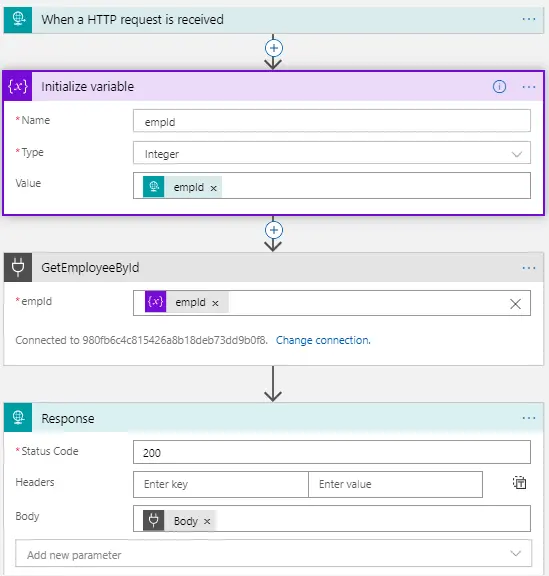
This time while triggering the logic app we pass the JSON object containing empId property and in response we get employee data.
Benefits of Using Custom Connectors
- The connector can be shared with other teams in our organization for reusability.
- Custom connectors support 4 different types of authentication: API Key, Basic Auth, None & OAuth2.
- We can get our custom connector certified from Microsoft.
Conclusion: We have created a custom connector to access web API operations and understood how to generate schema from payload which can be used as an input to the custom connector.