Sending Emails using SendGrid in Microsoft Azure

Sree Navya

While working on the projects, we might have a requirement to send emails to a set of recipients programmatically. For this, we usually use the SMTP server created at the client end for sending the emails, which involves a considerable amount of cost and maintenance of servers for the client. However, if we have to deal with low cost, low maintenance and also hold an Azure Subscription, then we can go about using the SendGrid Email Delivery Service available in Microsoft Azure.
What is SendGrid?
SendGrid is a cloud-based SMTP provider used to deliver marketing and transactional emails. SendGrid maintains email server on your organization’s behalf, so your messages are sent and delivered as needed.
SendGrid manages all of the technical requirements, from infrastructure to ISP outreach and monitoring to whitelist services and real-time analytics. It’s the world’s largest cloud-based service for delivering emails.
There are several ways to use SendGrid’s email services. However, it all depends on your requirement and what you want to accomplish.
How to set up and use SendGrid in Azure
Before you start, please ensure you have an active SendGrid Account in the Azure subscription
Follow below steps for creating a SendGrid Account and getting the details to send an email using SendGrid.
1. Login to the Azure subscription
2. Search for the ‘SendGrid Email Delivery’ service in the search box as shown below
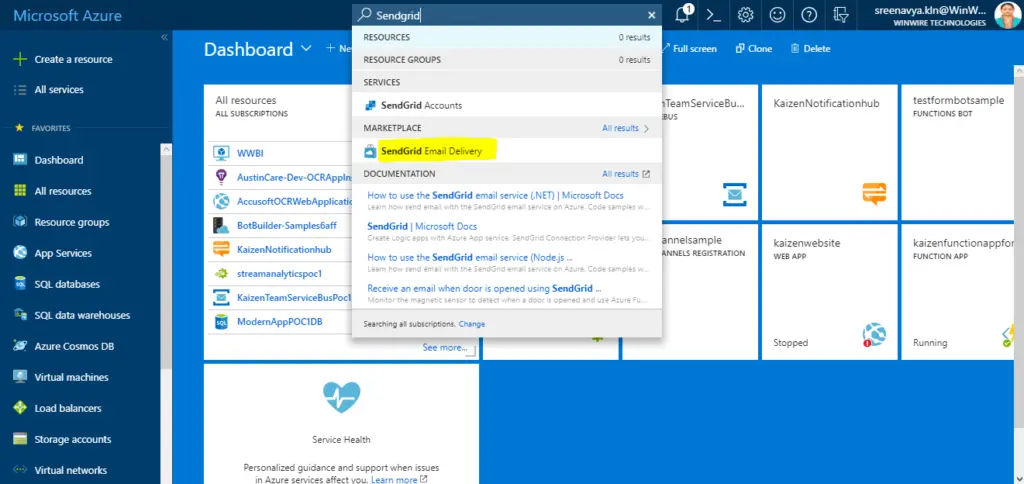
3. Click on the ‘SendGrid Email Delivery’ from the list. You will be navigated to the below screen for creating an account for SendGrid.
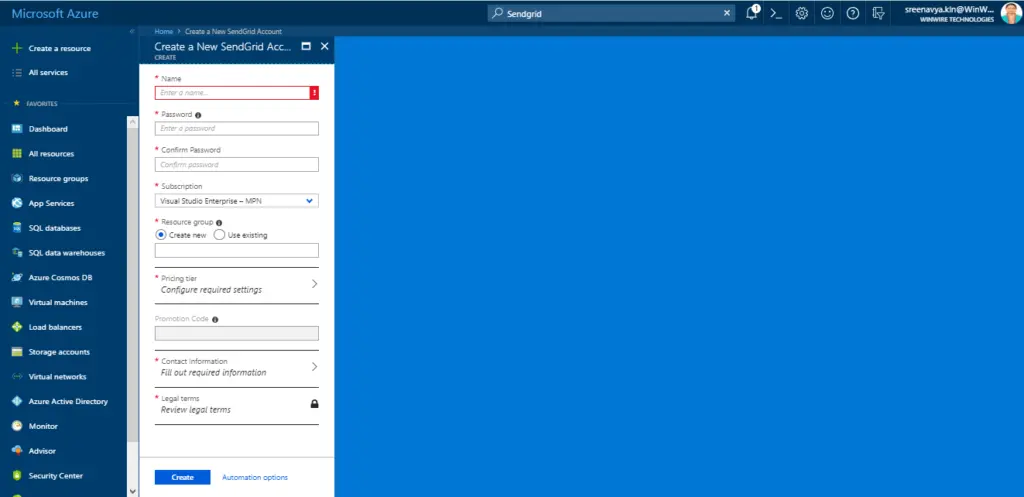
4. Provide the required details like Name, Password, Subscription, Resource Group.
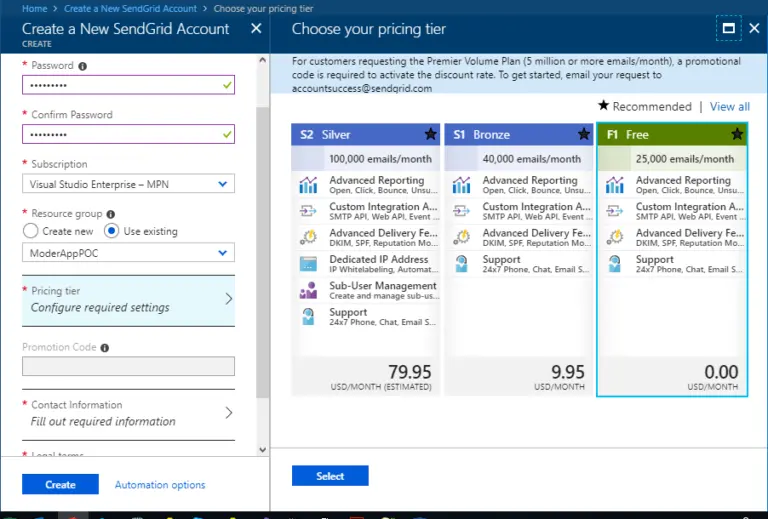
5. Choose the Pricing tier as shown below.
SendGrid provides several plans and pricing based on your requirements. The pricing depends on the features and the number of emails to be sent per month. It offers a free plan which will help you send 25,000 emails per month. For the demo, we will select the free plan.
6. Provide the contact information as mentioned below. This might be used for sending any information if the plan needs any upgrade based on your usage. Once all the information is provided, click ‘OK’.
7. For the legal terms, click the ‘Create’ button as shown below.
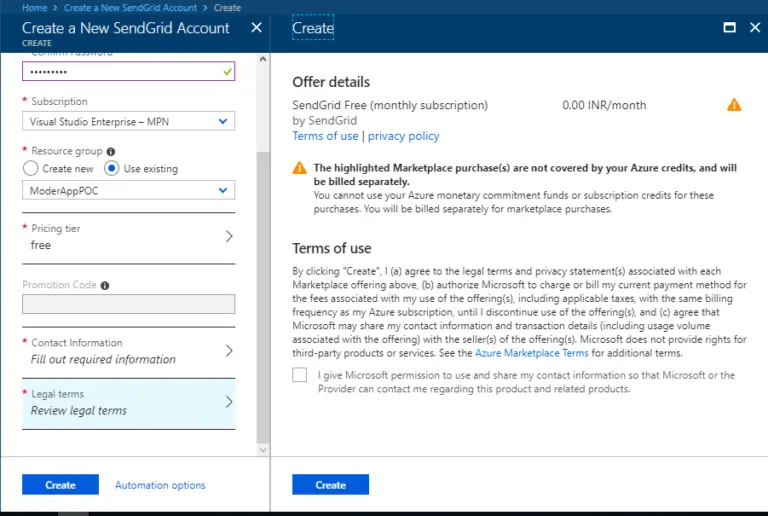
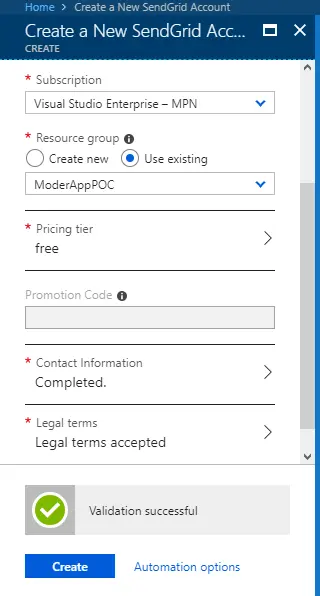
8. The input is validated and once the ‘Validation Successful’ message is displayed, click the‘Create’ button.
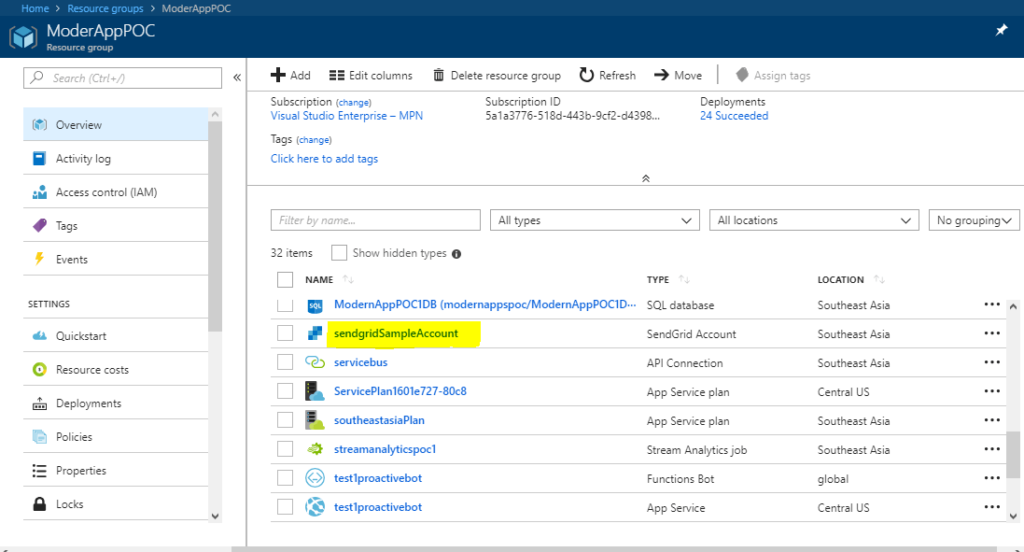
9. The account creation will take a couple of minutes. SendGrid account is displayed in the corresponding resource group as shown below.
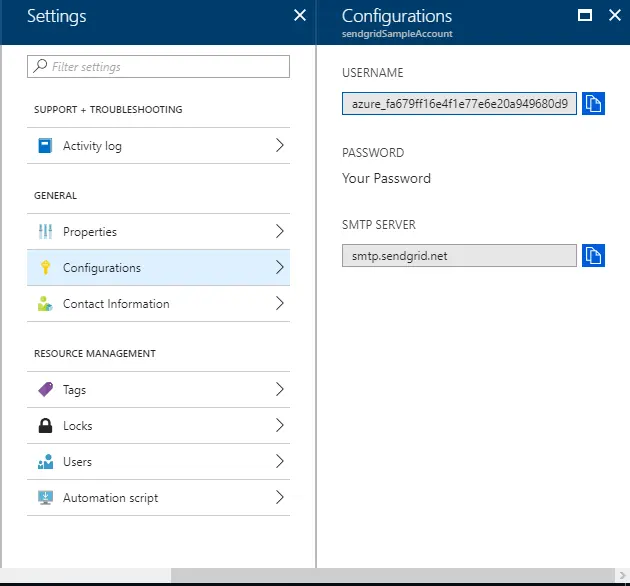
10. Click on the SendGrid account created and navigate to the settings page.
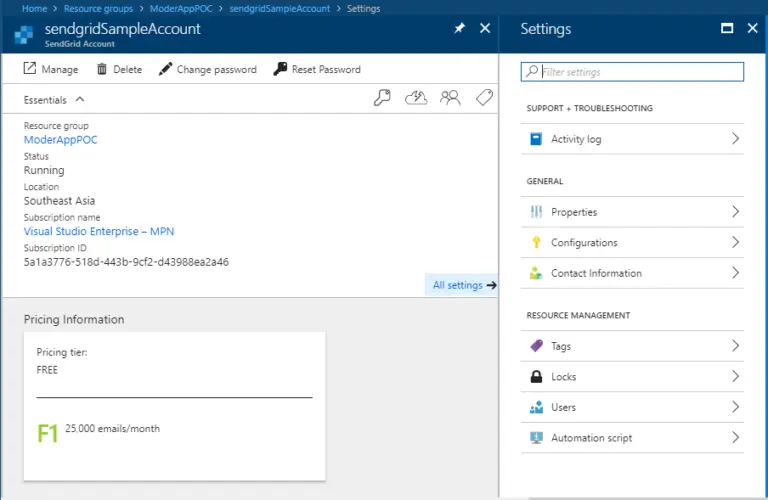
11. Click on ‘Configurations’ link and copy the ‘USERNAME’ and ‘SMTP SERVER.’ Remember to use the password provided while creating the account. These will be your SMTP credentials to send the email programmatically.
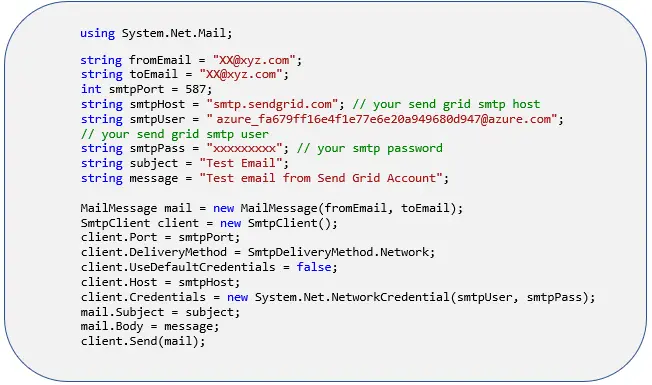
Sending email using SendGrid Account – SMTP Relay (C# code):
Below is the sample code which sends an email using the SMTP relay of the SendGrid account created in the steps as mentioned earlier.
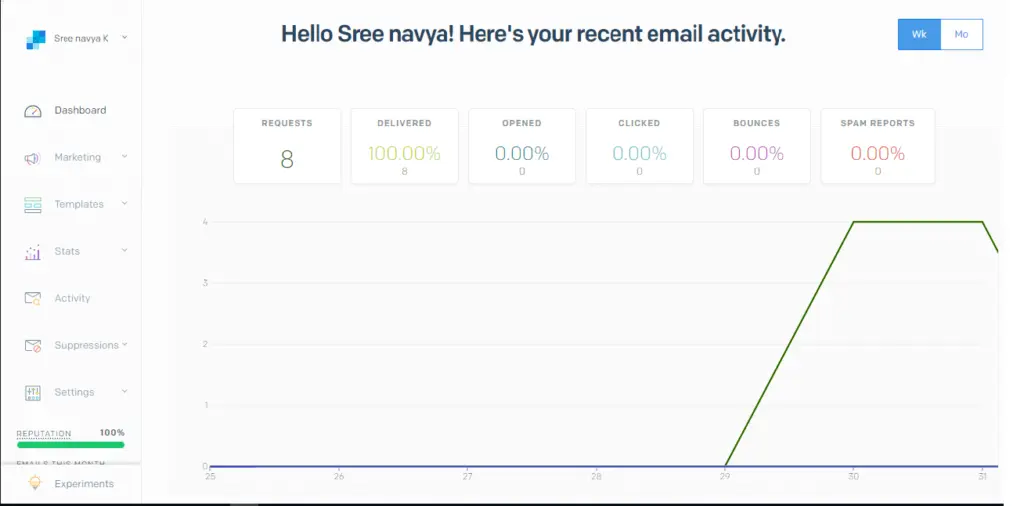
SendGrid Dashboard:
The email activity created using SendGrid account can be monitored in the Azure Portal.
Click on ‘Manage’ on the SendGrid account page and navigate to SendGrid App site. The dashboard provides information on the emails requested, delivered and more.