Why Coded UI is a Smart Choice in Test Automation?

Yuvaraj

Coded UI Test (CUIT) is a relatively new automation tool supported by high-level programming languages such as C# and Visual Basic .NET.
Find out why Coded UI is a Smart Choice in Test Automation
• Software testers and Developers can work using the same tools/language, which enables them to collaborate effectively.
• The Coded UI automation tool supports both web and windows projects, as both C# and VB.NET are known for their robustness.
• The element identification mechanism is a powerful feature in Coded UI.
• Coded UI strongly supports Synchronization. The Playback Engine supports features such as ‘WaitForReadyLevel’, ‘WaitForControlExist’ etc., it makes the test execution stop till UI Threads or All Threads are ready.
• Automation tests can be run on remote machines with the help of ‘Tests Agents’.
• Coded UI supports AJAX controls.
• Descriptive Programming is another impressive feature supported by Coded UI tool, which allows software testers to automate scenarios based on object properties. There’s no need to wait for the user interface to record/assert scenarios.
• Coded UI allows developing an extensive test suite and performing tests in local environments.
• Using Coded UI with a layered framework, automation teams can develop sophisticated tests.
• Utilizing Log4net.dll, software testers can log the results and capture exceptions in an effective manner
Software Requirements
• Requires Visual Studio Premium 2013 or Visual Studio Ultimate 2013 to create Coded UI Tests.Refer the link https://msdn.microsoft.com/en-us/library/dd380742.aspx for supported configurations.
Technology Managers on Coded UI
• MSAA – Microsoft Active Accessibility is a COM-based technology and it’s used to automate WIN Forms application.
• UIA – User Interface Automation is introduced with .Net Framework.
• Web – Used to access the DOM in a web browser
How to create Coded UI Test
• Recording Actions
• Programmatically (Data Driven)
Getting Started with Coded UI Automation
Recording Actions
• Create a CodedUI Solution
• Recording a Scenario
• To Assert a Scenario
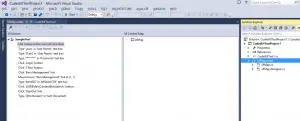
Create a Coded UI Solution
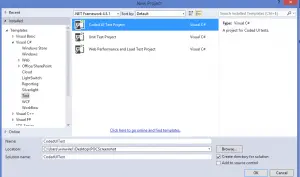
• Open Visual Studio 2013
File -> New -> Project-> Test -> Select Coded UI Test Project
‘
Click on Ok button and the following screen will display
Click on ok button and the following screen will display
Recording a Scenario
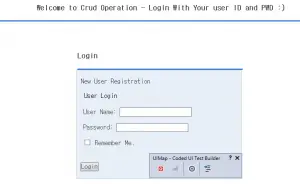
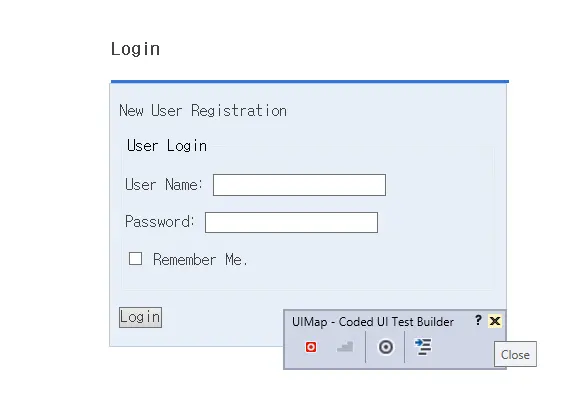
Open a Sample Web application and launch in the browser (Internet Explorer) as shown below
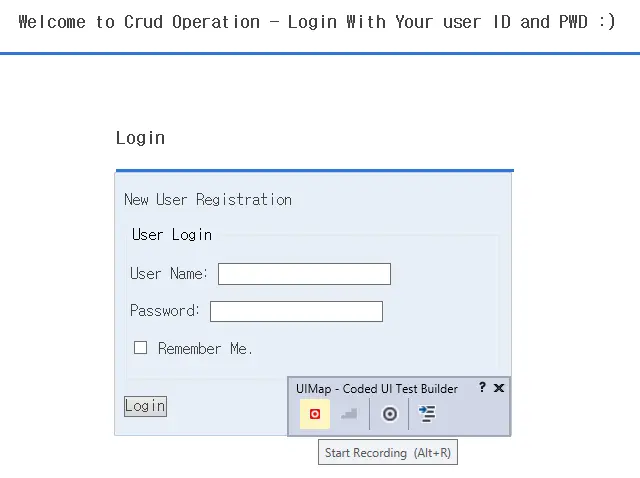
Move the Coded UI Test builder to the sample web application opened as shown below:
Now Click “Start Recording” on the Coded UI Test Builder as shown below:
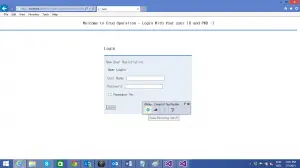
Now login to the Sample web application and navigate to one or two pages which you desired and click logout from the application.
Once you are logged out from the Sample web application, Click on “Pause Recoding” from the Coded UI Test Builder as shown below.
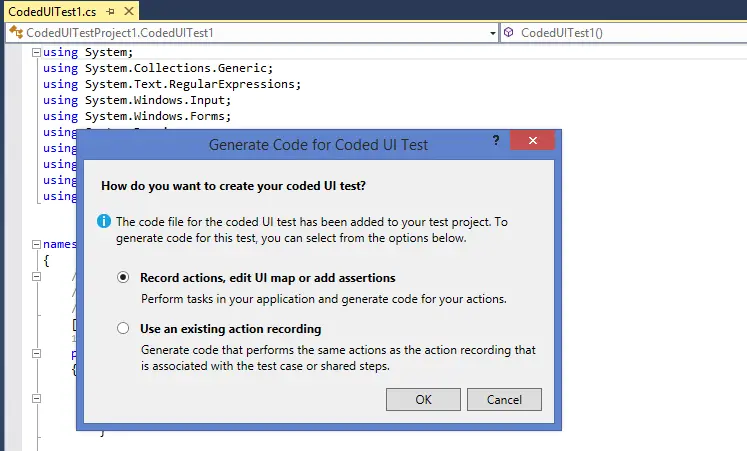
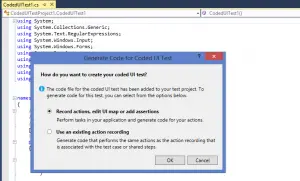
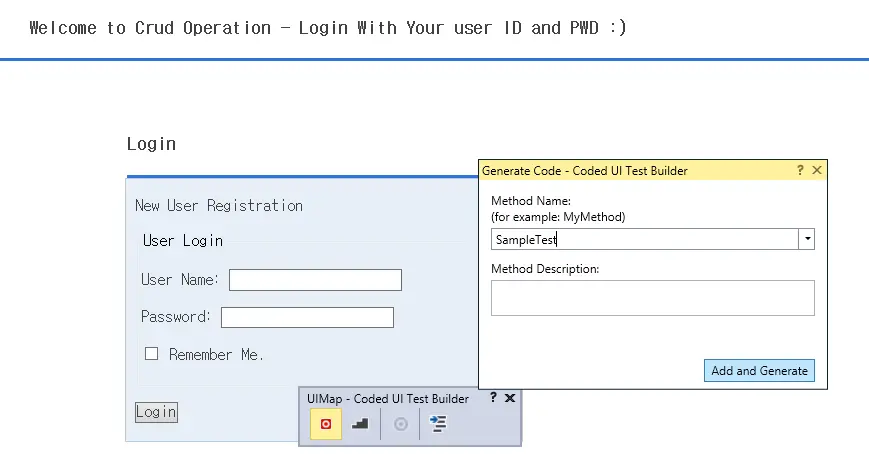
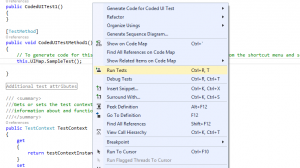
Click “Generate Code” (last menu) on the Coded UI builder and the following screen will display. Provide your Method Name for your test case.
Click Add and Generate button and that will generate the test code for the sample Web application.
Click “Close” button from Coded UI test Builder as shown below:
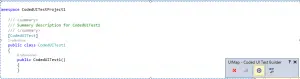
Open the Sample Coded UI Project and Expand the UIMap.uitest as shown below:
To Assert a Scenario
• Assertion feature is available in Coded UI Test Builder. Normally, checkpoints are called as Assertions in Coded UI, an Assertion can be added based on the property of an element.
• In the ‘UI Control Map’, we can add, delete or rename controls. Once the assertion is added, we can set the comparison operator and the value to compare.
• We can add an Assertion (checkpoint) by clicking ALT + U or by clicking on the Assertion icon available on the Coded UI Test Builder.
Build the Solution and Run the Tests
• After the ‘Test Methods’ are written, build the solution to view the automated test scenarios under ‘Test Explorer’.
How to Run Test Case(s)
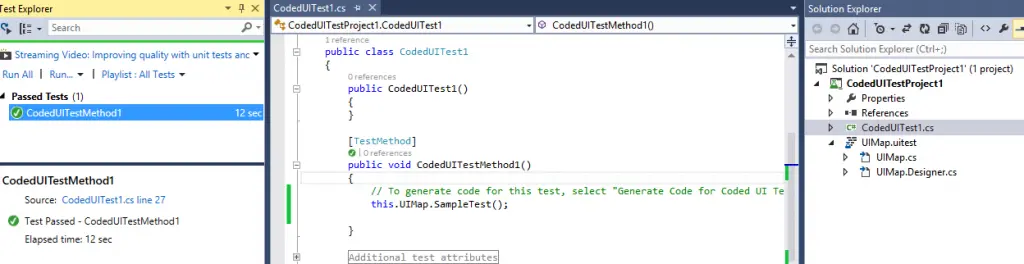
• Select the required Test case(s) and then right click and select ‘Run Selected Tests’ as shown below:
Once the test cases are executed the following screen will display with execution results.
Congratulations! You are ready to work with Coded UI (Recording Actions)! In my next blog, “Data Driven approach in Coded UI″ and will demonstrate some basic functionalities.