How to create a custom connector in Power Automate

Ankit

In this blog post we will learn to understand what a custom connector is and how we can create a custom connector in Power Automate.
Microsoft provides numerous connectors to connect to various applications but there can be cases where we do not have a built-in connector for an application. In such scenarios, we can create a custom connector to connect with such applications.
To connect to an external data source, Power Automate has multiple connectors. These data sources can be SharePoint, SQL, Salesforce, etc. There are certain connectors which are free and certain connectors require premium license.
Why we need Custom Connector
If Power Automate does not have a connector for the data source, and if that platform has an API through which it can be connected, then, there is an “HTTP” connector which can call this API and connect to data source.
But, what if the “HTTP” connector is blocked by the organization?
What is a Custom Connector
Custom Connector gives us the ability to create our own connector and connect data sources using API along with authentication.
Note: To create a custom connector, a standalone Power Automate premium license is required. The default license that is part of O365 Enterprise plans does not include the license to create custom connectors.
Introduction: Currency beacon API
The currency beacon provides REST API with live and historical currency exchange rates. We will create a custom connector to connect this API. We will pass a base currency and obtain real-time rates of all currencies with respect to the base currency.
To get the authentication key to use this API, sign up to the currency beacon and login.
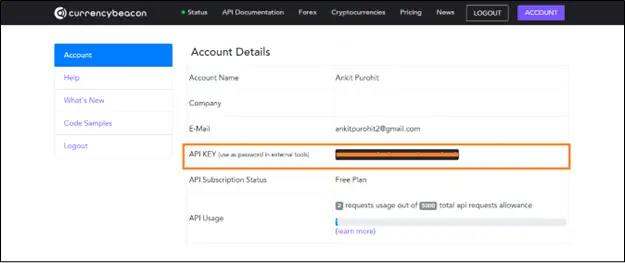
Once you login, you will be able to see an API key in your account.
You can read the API Documentation to see all the endpoints. For this article, we will be using the “latest” end point.
How to Create a Custom Connector in Power Automate
To create a new custom connector, open the link https://make.powerautomate.com/
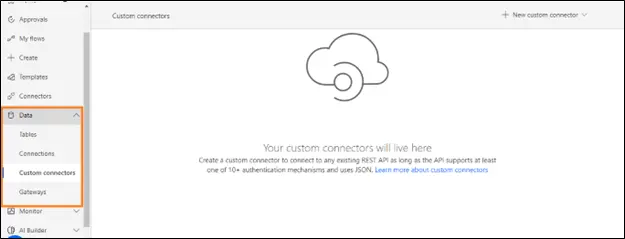
Expand the “Data” tab and click on “Custom connectors”.
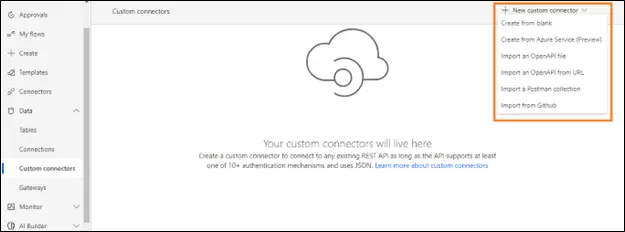
Click on “New custom connector” from the top right section and then click “Create from blank”.
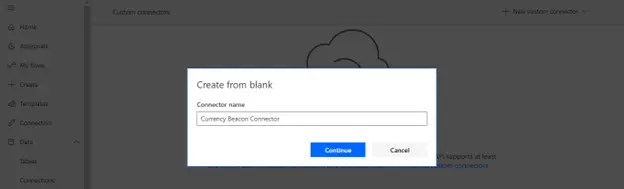
Enter the desired custom connector name and click on Continue.
General Information – Fill in the General Information for your custom connector like color and description and upload icon if required.
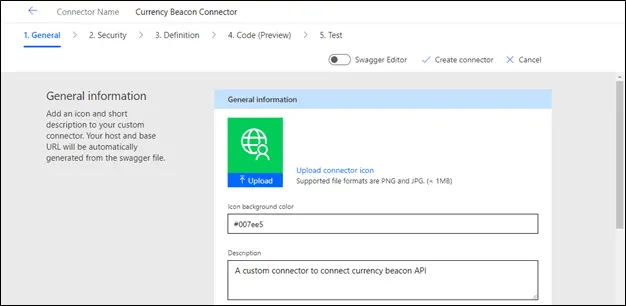
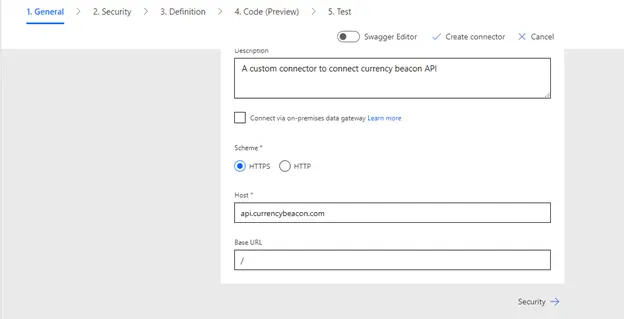
Keep the scheme selected as “HTTPS”. Enter the host name “api.currencybeacon.com” and keep the Base URL as “/”.
Security –
Next step is to set the security for connecting the API. The current API supports authentication using an API key. However, there are other options like No Authentication, Basic Authentication and OAuth 2.0.
These options can be used based on the authentication method that API supports. On the Security tab, select the Authentication Type as “API Key”. In the API key details, enter the following information:
| Parameter label | API Key |
| Parameter name | api_key |
| Parameter location | Query |
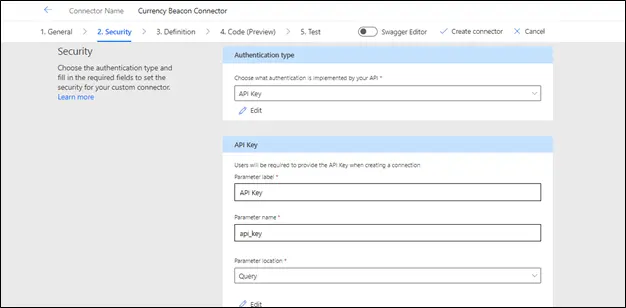
As we have selected parameter location as Query, the API key will be part of the URL as a query parameter.
Using an API key as a query parameter might not be a secure solution. We have an option to add the key in header also. However, it depends on the API, how it will accept the key. Moreover, we will be using this custom connector in Power Automate, so, end users will not be able to see the requests made to API.
Definition – The actual operations that we need to perform using API will be part of definition tab.
- On the Definition tab, select “New Action”.
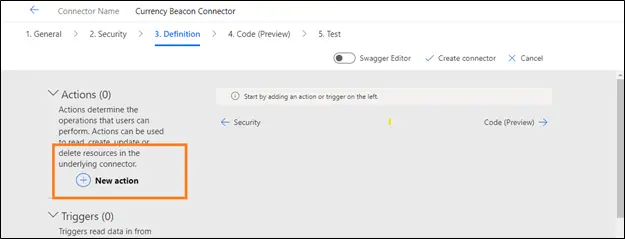
- This action is the operation that we will perform using API. You can add multiple actions inside the definition tab.
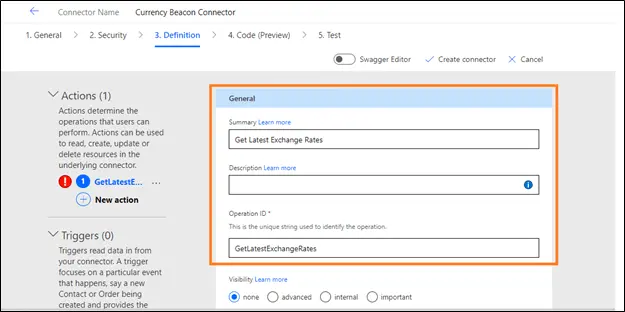
- Here, we will add an action to get the latest exchange rates. So, enter the details as below:
| Summary | Get Latest Exchange Rates |
| Operation ID | GetLatestExchangeRates |
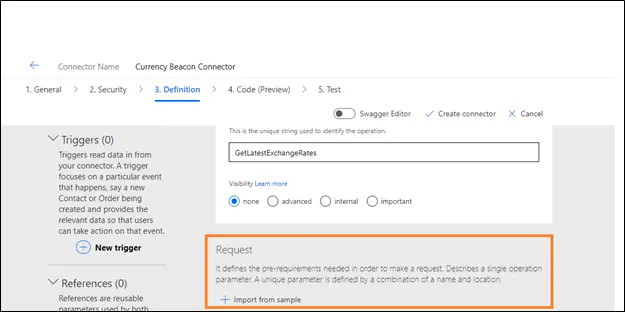
- Next, we need to define the request URL and any additional headers and query parameters that we need to send along with the endpoint URL.
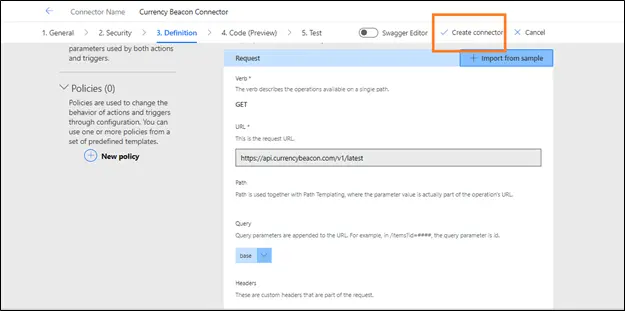
- Click on “Import from sample”.
Select the Verb “Get” and enter the URL: https://api.currencybeacon.com/v1/latest?base=USD and click “Import”.
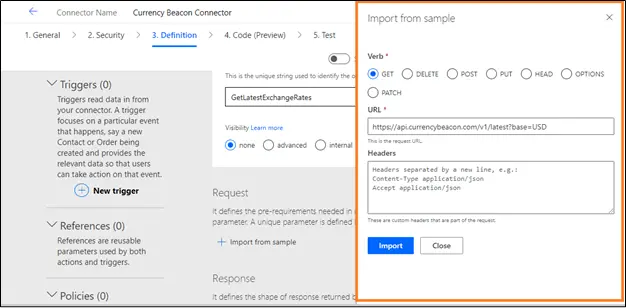
This will set our endpoint with the necessary query parameter.
- We have set “base” as query parameter, as it is a mandatory parameter for “Latest” endpoint.
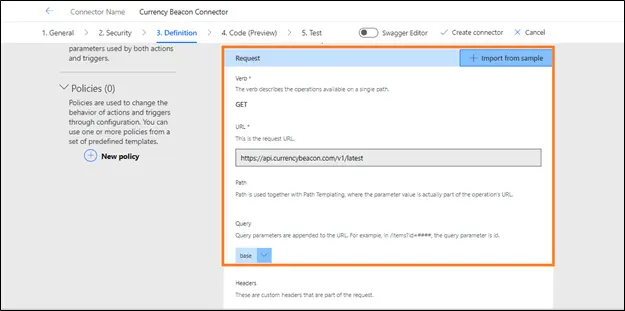
- You can also import Response format; however, it is optional.
- The Other optional part is the fourth step which is “Code (Preview)” using which you can transform you request or response payload.
- Now, click on “Create Connector”.
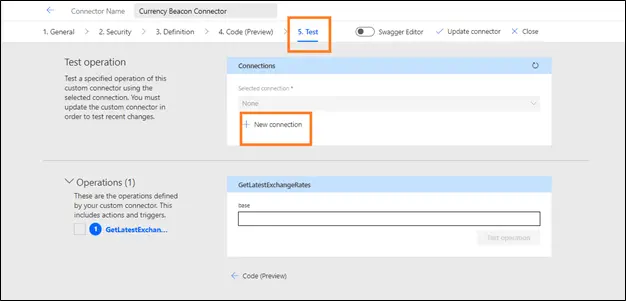
Test – To test the connector, we need to create a connection once the connector is created.
So, click on “Test” tab and click “New Connection”.
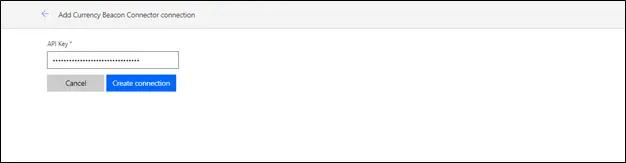
- This will open a new window where we need to enter the API Key that is provided by currency beacon. You can access this key from your currency beacon account dashboard “API KEY” field.
- Copy and paste this key in the API Key textbox of the new connection page and click “Create Connection”.
Once the connection is created, click on the refresh icon on the custom connector’s Test tab.
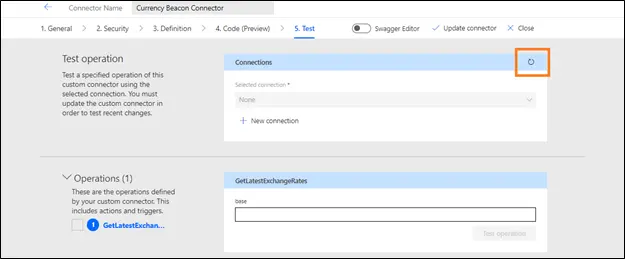
This will automatically select the newly created connection.
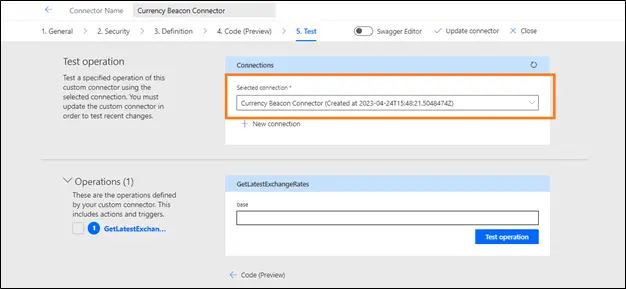
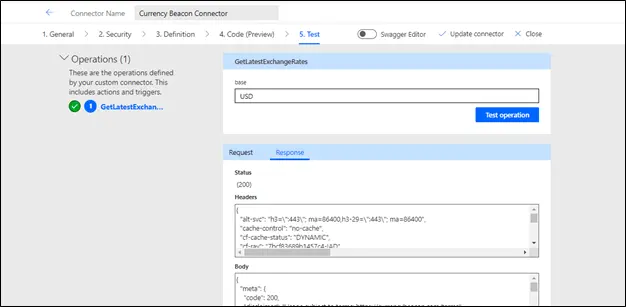
- Now, enter the “base” parameter as “USD” which is the code for US dollars currency and click on “Test operation”.
- This will execute the custom connector and will get the all the latest exchange rates with base as USD.
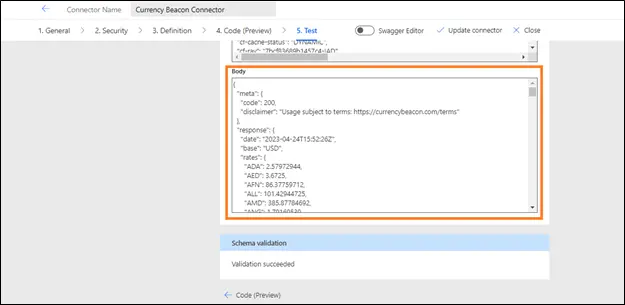
The response will look like this:
How to use Currency Beacon Custom Connector in Power Automate?
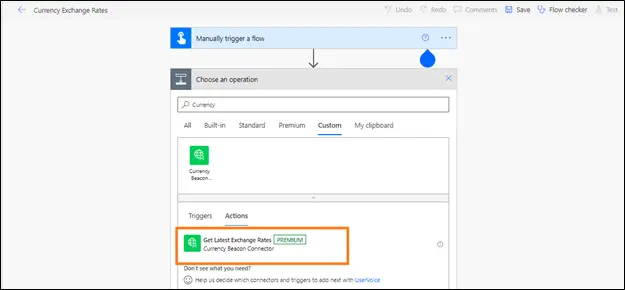
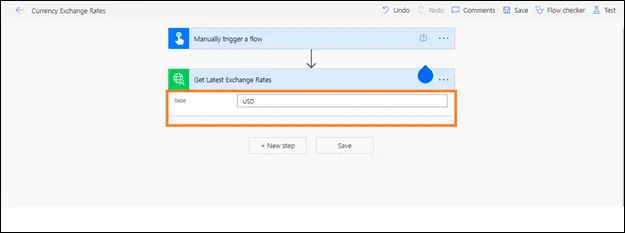
- To utilize this custom connector in Power Automate, create an instant flow.
- Add and action and select “Custom”. Select “Get Latest Exchange Rates” connector.
Enter the “base” parameter value as “USD” and save the flow.
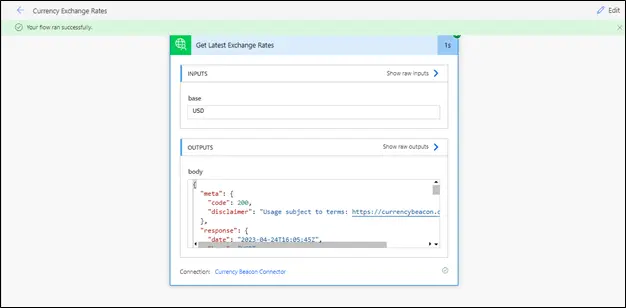
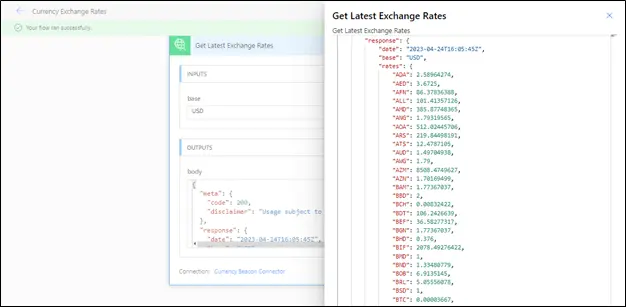
Click on “Test” to run the flow and check the results. It will return all the available exchange rates with base as “USD”.
So, this is how you can create and configure a custom connector and use it inside your Power Automate flow.
This will help in connecting and accessing data from data sources for which we do not have a built-in connector.