Merge Data into a Single Table using Azure Data Factory

Lokesh

I recently came across a scenario where the source files in Azure blob storage container had slightly different schemas, i.e., one set of files had an extra column compared to another set of files. The challenge was to identify this diverse set of files and load it into a single target table on the fly.
How to handle files with a slightly different structure (coming from the same source/repository) and transfer/merge the data into a single table using Azure Data Factory?
For example, File1 has columns – Name, Age, Department.
| Name | Age | Department |
| John | 34 | IT |
| Mathew | 45 | Finance |
File2 has columns – Id, Name, Age, Department
| ID | Name | Age | Department |
| 12 | Steve | 40 | HR |
| 17 | Fleming | 44 | Finance |
Data in the target table (say EmployeeDetails) should look like
| ID | Name | Age | Department |
| 12 | Steve | 40 | HR |
| 17 | Fleming | 44 | Finance |
| John | 34 | IT | |
| Mathew | 45 | Finance |
Solution Summary
- Count the columns in the source file
- Check the value of the first row and first column of a given source file.
- Add 2 copy data activities for each of the file types, map the source and target columns explicitly.
- Based on #1 and #2 checks, decide which copy data activity to select for a give file type.
Detailed Explanation of steps involved in the pipeline
All of the files have extension as .prd and the ask is to load these into Azure DWH or synapse.
- Load the files from amazon s3 to azure blob using copy data activity. No special settings in the source and target files here. Just select the encoding as UTF-8.
- There will be 3 tables to assist in loading.
- TableFileName – It will hold the name of files and the value of first column and first row present in blob storage.
Example if the file (titled File1) has 1, Lokesh, 35, Health as the first row. The table will have values
| File1 | 1 |
- TableErrorFileName – It will hold the name of files which have failed to load.
- StagingTable – This will be the actual target table with the data from the source files.
- Before loading clear or truncate all these tables.
- Child Pipeline
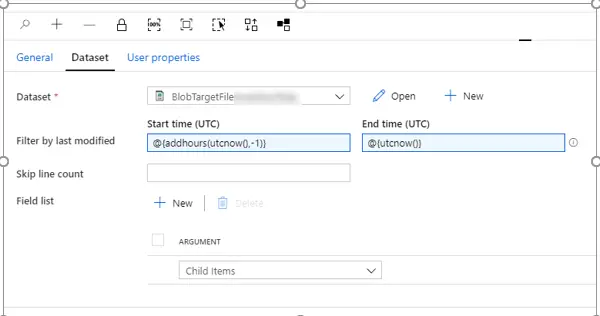
a. First step in this pipeline is GET METADATA activity which will have the dataset mapped to blob storage where source files are kept, and field list will be set to Child Items.
b. Second step will be a for each loop container.
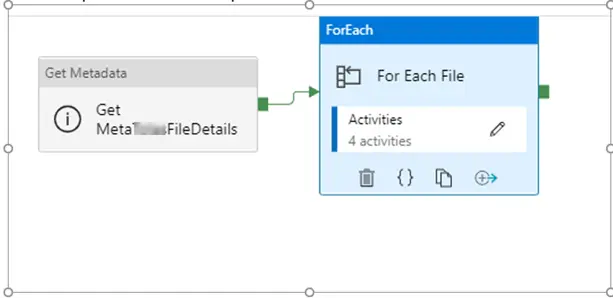
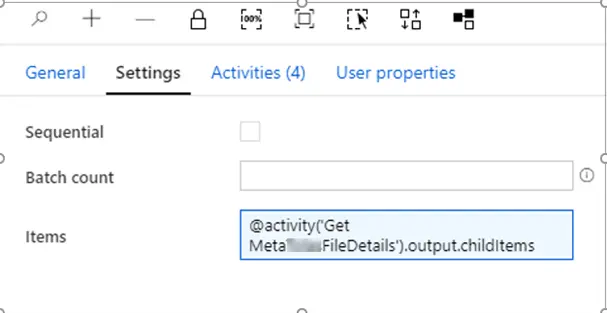
It further has these activities
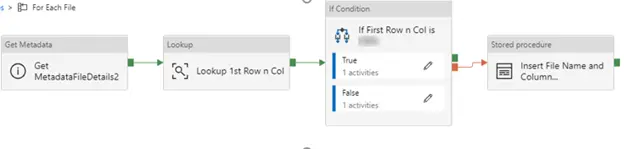
- “Get Metadata….2” – This is set to parameterized dataset which points to a file from the blob storage. This is done to get the column count from a given source file.
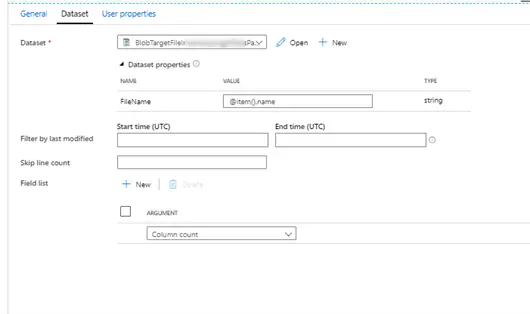
- Lookup First Row and Column – Points to a parameterized dataset. This activity is added to get the first column and first row value of the source file and additionally to prevent a no or blank file name being passed to the subsequent step. A no file name will be hard to handle therefore inserted a dummy file called test.txt which will prevent the operation from failing.
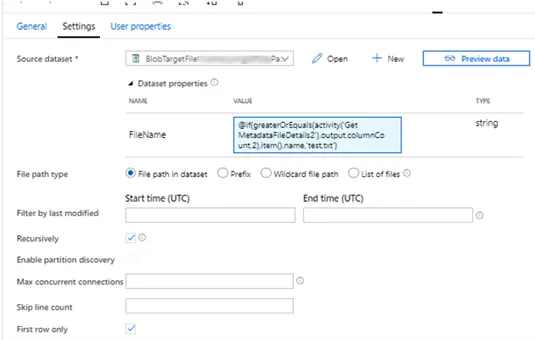
Expression – @if(greaterOrEquals(activity(‘Get MetadataFileDetails2′).output.columnCount,2),item().name,’test.txt’)
- “If First Row n Col is …” – Next activity is if activity, its job is to find out the type of file based on its first column value.
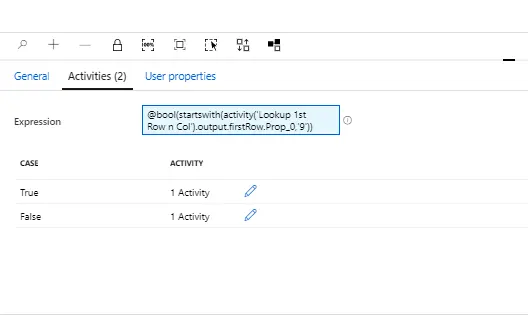
Expression – @bool(startswith(activity(‘Lookup 1st Row n Col’).output.firstRow.Prop_0,’9′))
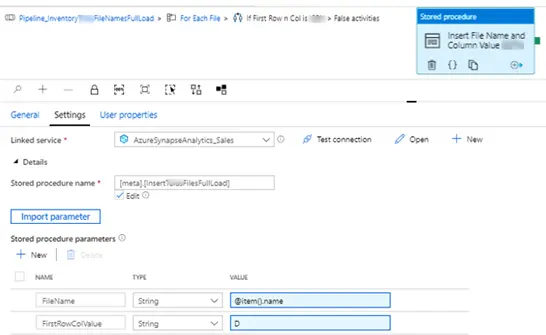
- True condition – Insert the file name and the first column and row value in TableFileName (which is already been created, please refer to #1).
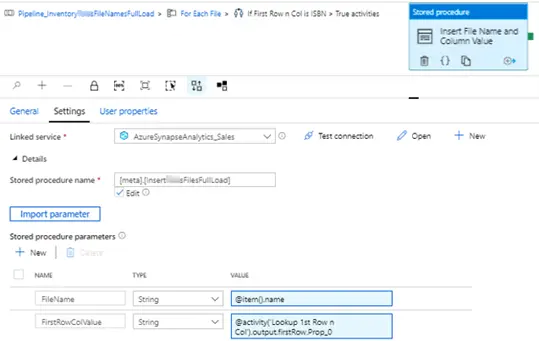
- False condition – Insert the file name and hard coded flag or value in TableFileName. This will help identifying or distinguishing between the 2 different types of file.
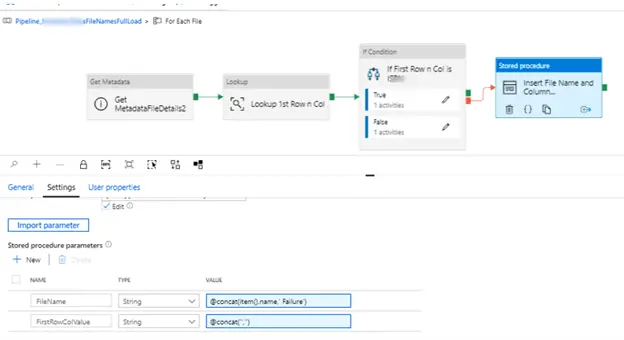
- If the “if activity” fails, then insert the file name into the same table with first column value concatenated to failure.
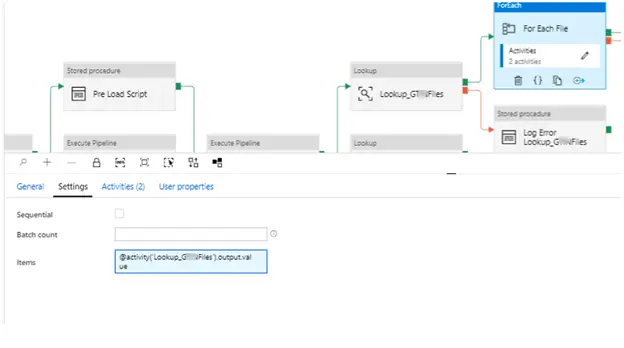
5. (Return to main pipeline) “Lookup_G…Files”. This lookup queries for one type of file out of the 2 possible ones by querying data inside the table TableFileName.
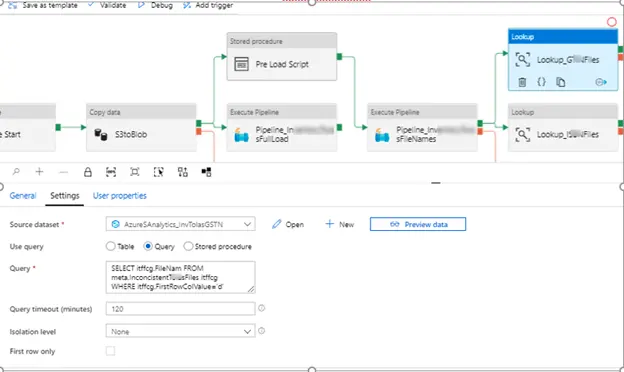
6. Other lookup (“Lookup_I…Files”) queries the second type of the file. As the lookups return multiple rows the “first row” property is not set.
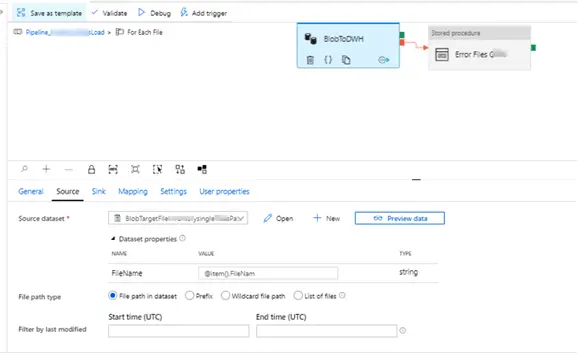
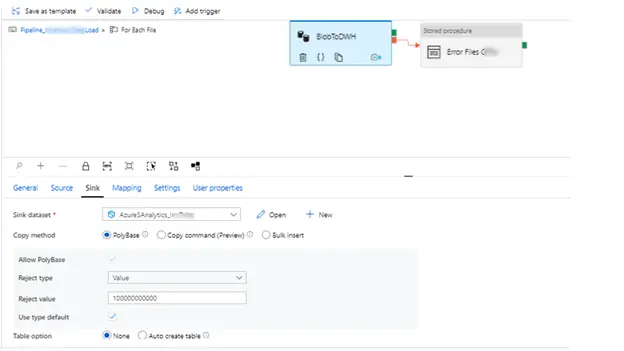
7. Each of these lookups then feed the output to for each loop container. These containers have a copy data activity to transfer the data into the target table.
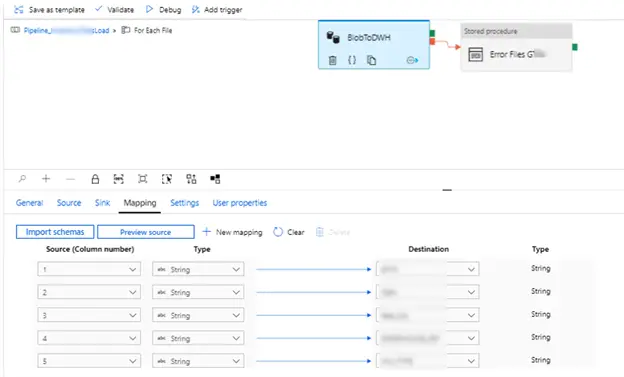
8. Eventually data is inserted into the respective tables with the file names of the failed files are inserted into error table TableErrorFileName. One of the important settings here is that the mapping must be explicitly specified.
Get Metadata activity in ADF will provide important meta data parameters about the file/folder of files which can be leveraged to make decision on the actual loading of the data. For instance, in this case we made use of “Column Count” parameter. I hope this gave you an end-to-end look at how to Merge Data into a Single Table using Azure Data Factory and saved you from looking through 10 different bits of documentation.